expert advice / alpine trekking
HOW TO PACK AND ORGANIZE A HIKING BACKPACK
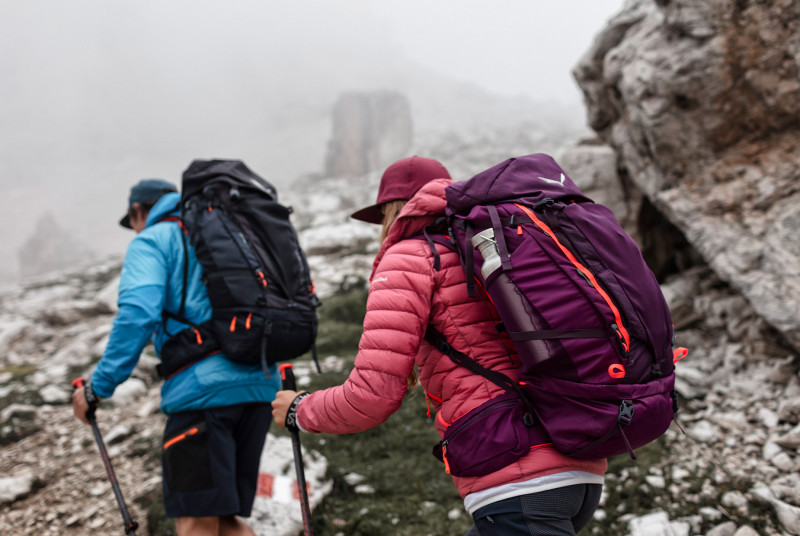
1. How to pack and organize a hiking backpack. For the Dolomites, or wherever your local mountains are.
A well-packed backpack can make all the difference to enjoying your time in the mountains – whether day trip, hut-to-hut adventure or a week trekking in the backcountry with a sleeping bag and tent. If it isn’t packed correctly, even the best pack in the world is not going to be comfortable. Packing to create a well-balanced load is definitely more comfortable and will make you more secure in difficult terrain. Thinking carefully about how you pack can also reduce fatigue, which ultimately is an important safety factor in itself.
The principle aim of correct packing is to:
- create balance for a safer carry
- reduce the burden on your back and shoulders
- make sure you only carry what you need – less is more
It can be hard work, making progress over rough terrain in the mountains. Alpine climbing, mountaineering, speed hiking and ski touring are all strenuous activities. And alpine trekking requires endurance too. Once you’ve found the right backpack for the activity you want to undertake, ideally one that provides good ventilation for your back, like Salewa’s Dry breathable backpack, then the next most important thing to do is to pack it right.
We’ve put together some useful tips and advice on getting your gear packed in the best possible way – so you can get out there and enjoy your time in the mountains to the full.
2. What do I need to consider when packing a backpack?
- Weight distribution
As a general rule: heavy at the bottom, light at the top. When packing your trekking pack, try to position heavier items lower down and closer to your back, so they are closer to your centre of gravity. And place lighter items towards the top, where they will have little effect on your balance. This will give you better control over the load and reduce the risk of imbalance. - Accessibility
Frequently used items (like maps, snacks etc.) should be packed at the top or in the outside pockets, so that you can access them easily. The same goes for extra layers of clothing which you will want to get out quickly when you have rest breaks, or when the wind is howling on the summit. Items that you only need at the end of the day, like your tent and sleeping equipment, can be lower down and occupy space that is harder to get to. - Weather conditions
The weather situation will dictate how you pack your backpack too. Cold weather can lead to food items freezing, so you may want to stash some items closer to your body (or even in your jacket pocket) or wrap them in insulating layers. A rain cover is something to consider, but even with a rain cover it’s always advisable to stash clothing and sleeping bags inside dry bags within your pack. No backpack is fully waterproof.
2. What do I need to consider when packing a backpack?
3. How do I pack a backpack for single-day use in the mountains?
3.1 What size pack do I need for single-day use?
3.2 Which items do I pack first?
3.3 Which items do I pack at the top and in the lid of the backpack?
3.3.1 More top tips on stashing your gear
4. How do I pack a backpack for multi-day trekking in the mountains?
4.1 What size pack do I need for a multi-day trek?
4.2 Which items do I pack first?
4.3 Which items do I pack in the middle of the pack?
4.4 Which items do I pack at the top and in the lid of the backpack?
4.4.1 More top tips for multi-day treks
5. How do I pack a backpack for winter trekking/ ski touring/ ski mountaineering in the mountains?
5.1 Do I need a different backpack for winter use?
5.2 Which items do I pack first?
5.3 Which items do I pack at the top and in the lid of the backpack?
3. How do I pack a backpack for single-day use in the mountains?
3.1 What size pack do I need for single-day use?
Depending on the activity and any extra gear that might be needed (like ice axes, crampons etc.) try to keep the pack, and therefore the weight, down to a minimum. Choose lightweight backpacks from 14 litres, like the SALEWA Ultra Train which is designed for fast and light mountain sports and is therefore smaller, through to something like the MTN Trainer 28, will accommodate all the gear you need for most single-day activities in the mountains.
3.2 Which items do I pack first?
For single-day mountain activities you’re really looking at taking the bare essentials only. The same principles apply for small packs as they do for larger packs, but a daypack will not have a bottom section and is generally shorter. Pack heavier items close to your body (making sure there are no sharp edges that might stick into your back). These might include spare clothing, food or water (reservoir or bottle). Next, you can pack any waterproof or insulation layers.
3.3 Which items do I pack at the top and in the lid of the backpack?
The top / lid of a daypack, and any external pockets if available, are a good place to store smaller items and those you want to be able to access more frequently or in an emergency. A first aid kit is always essential when travelling through the mountains, no matter what the activity. But you will also need to stash items like your keys, phone, maps, compass etc. in the upper part of your pack, ideally in secure zipped pockets.
3.3.1 More top tips on stashing your gear?
Try to keep your daypack as compact and uncluttered as possible. This makes your passage through tight, rocky terrain safer with less likelihood of getting snagged up and losing your balance.
4. How do I pack a backpack for multi-day trekking in the mountains?
4.1 What size pack do I need for a multi-day trek?
Moving through the mountains for several days at a time means you’ll need to carry more gear – whether it’s sleeping equipment and a tent, or if you’re sleeping in huts, then more food or clothing perhaps. Pack sizes range from approx. 35 to 65 litres in size. See: SALEWA Alp Trainer 35+3 or the Alptrek range.
4.2 Which items do I pack first?
Soft, bulky items like your sleeping bag, sleep mat, extra set of clothes, should go at the bottom of a larger pack. Then pack your hydration bladder, if using one.
4.3 Which items do I pack in the middle of the pack?
Next, comes the heavy items like a tent, bivouac, stove, fuel, food etc. But make sure these are buffered towards your back so that no sharp edges protrude to make it uncomfortable.
4.4 Which items do I pack at the top and in the lid of the backpack?
Navigation equipment (maps, GPS, compass etc.), sunglasses, hat, sun protection, first aid etc. are more accessible if stored in the top of the pack, lid pockets or even hip belt pockets. It’s also good to keep snacks close to hand so you can access them easily while you’re on the move. And you’ll want an extra insulation layer handy for rest breaks. Your rain jacket can be stashed in one of the stuff pockets or bungee cords on the outside of the pack so it’s also accessible.
4.4.1 More top tips for multi-day treks
- Make sure you pack your sleeping bag and clothes, including insulation layer, in waterproof bags like drybags.
- Try to keep heavy items central within the pack and between your shoulder blades, so that the weight is evenly distributed across your back.
- For hydration, if you choose a bottle system, then packs like the Alptrek feature lateral stretch pockets which are ideal for keeping your water bottle handy.
- On multi-day treks, you can attach your sleep mat to the base of your pack to save space.
- Once you’ve packed, make sure you tighten all the compression straps to keep the load compact.
5. How do I pack a backpack for winter trekking/ ski touring/ ski mountaineering in the mountains?
5.1 Do I need a different backpack for winter use?
Essentially, no. But you will find that whatever pack you use for winter mountain use will need to have attachment options to suit your activity. Most winter packs will have a dedicated compartment for your probe and snow shovel, a ski/snowboard attachment system, plus somewhere to store a helmet. Winter mountain activities generally require more equipment and so a slightly larger pack should be considered – between 25 and 35 litres.
5.2 Which items do I pack first?
Your hydration bladder, if using one, should go first. Then, food and ski repair kit, followed by extra layers like a hardshell jacket, spare gloves / liner gloves, hat etc. in a drybag to keep them dry. Always pack a very warm layer, like a down jacket, in case of injury and having to wait around for rescue.
5.3 Which items do I pack at the top and in the lid of the backpack?
Aside from sun protection and snacks that need to be easily accessed, you might also have skins and crampons, which are ideally stashed in their own pocket. A climbing rope can be attached to the top of the pack. Goggles can be stashed in a dedicated goggles pocket, or at the top of the main pack.
5.3.1 More top tips on stashing your winter gear.
- Ice axe, snowshoes: These can be ice axe can be attached to the outside of the pack using special straps.
- Ski: Always make sure your skis are securely attached. If you’re not sure, check the manufacturer’s recommended configuration. The main techniques are side/parallel attachment and double fixation. Some packs also offer rapid access and on-the-fly fixation, like the SALEWA Winter Train.
- Avalanche safety gear is an integral part of spending time in the mountains in winter and therefore needs to be easily and quickly accessible in an emergency. Never stash your transceiver in your pack as it can be torn off your body in an avalanche. Having and carrying the gear is not enough in itself though. Make sure that you know how to use it. And that the people you are with do too. Get the knowledge and keep your skills fresh.
- If stashing crampons inside your pack, make sure they are in a reinforced bag or layer of some kind so that the spikes do not damage your pack. Some people argue that carrying them inside the pack is safer than strapped to the outside of the pack. It depends on how quick you want to get at them.
- Consider bringing two sets of goggles, for when one pair is steamed up and the weather is still coming in hard.